August 24, 2010

Let's summarize...

After a couple days break from the machine and posting here is where I stand.  The cabinet is completely built now just some detail painting left to do.  I'm still working out some control panel bugs with wiring difficulties or some emulator setup issues.  It's nothing big, but will take a couple hours.  By end of the night on Friday I had all the major pieces done including replacing my light bar after seeing it was 1/4" too long.  I will cover move stuff in greater detail later, but here are the action shots.
The completed cabinet minus some blue accent paint
The completed back.  Keyboard is wireless and velcro-ed to the case.  Power button turns on entire cabinet.
The control panel from underneath.  Attached to cabinet via piano hinge.  Ipac controller on top right and old Kensington Expert trackball held into routed socket with plexiglass insert and to wooden spacers.  On the bottom of the control panel box are Coin1, Coin2 as well as one that you can't see to flip player one control from left to center joystick.
With the back panel removed.  Aver 233H monitor is mounted on laminated 1/2" plywood with holes drilled for 100x100 VESA pattern.  It's attached to two angled brackets on the sides to give the appropriate angle.  Above the monitor mount on both sides you can see the Cambridge Soundworks speakers I mounted to the cabinet behind my fabric covered speaker cutouts.  The powerstrip is a Belkin Smart AV that senses load from the computer and turns on the monitor, speaker and marquee light so I can control it with the one buton I hard wired into the computer.

More later I'm sure.....

August 20, 2010

Time to stop before I do something stupid

It's at this point in the project it's hard not to keep working because you see the finish line.  Thanks to Justin's idea and a Belkin Smart AV surge suppressor the whole cabinet can be turned on with the press of one button and it shuts itself off 10 seconds after the computer shuts down.  Justin told me how to hack the power button to one of the switches and it works like a charm.

Here's where I stand right now

In terms of hitting my plan for the night I did pretty well.  The trackball mount is done, but I didn't get the panel wired, but the marquee and bezel are all set and the speakers are mounted.  Morning is wiring time.

It's a mad, mad, mad world

We are in the mad rush stage for the Saturday afternoon cookout now.  Last night:

  • Routed the T-molding channel on cabinet and control panel.
  • Two coats of paint on the cabinet and what I had done
  • Primed everything else: bezel, door, floor
  • Cut door
  • Routed relief cuts for joysticks(went 1/8th too deep on one, but I'll put in a layer of 1/8 plexi just to level it.
  • Worked on trackball cutout.
  • This morning put second coat on everything with one coat and first coat on primed items.
Tonight:
  • Second coat on control panel, door, and bezel
  • While that dries
    • Cut button hole for power on back of cabinet
    • Install light up top and weather strip around to prevent light leakage
    • Install T-molding on cabinet
    • Install top
    • Install marquee with holder
    • Hack power button on computer to button in cabinet.
  • After dry
    • Install T-molding on control panel
    • Route out Trackball insert
      • 2 1/8" hole from top
      • 1/4" roundover from top
      • 1/2" depth relief area on bottom for unit base
      • 1/2" chamfer route from bottom to allow free movement of ball
    • Prime trackball hole to seal MDF
    • Install door with Tot-lock magnetic lock
    • Wire panel
  • Run around world at light speed + like Superman to reverse time and allow for more time to complete:)
Pictures tomorrow.

August 18, 2010

It's beginning to look a lot like Christmas..

Closer still...  Bezel insert cut and mounted.  Final mounting brackets for the monitor adjusted to bezel height.  Primer coat on the machine.

Tomorrow T-molding channel, door, and first coat of paint.  Can't decide what I want to do with the control panel so I'm going to paint it then clear coat it I think, at least for this weekend.

Let's pause now for station identification

Running a bit behind on the daily posts.  Monday was date night with dinner and a movie so I took it off from cabinet construction.  Got a late start last night so the update comes this morning.  No pictures either since my blackberry is going a bit mental right now.

Redesigned the bezel setup for the 13th time.  Since I'm positioning the monitor vertically I decided to open up speaker holes on either side of the monitor that are 3/4 size compared to the monitor.  I'll cover the back with cloth and then mount the speakers behind that.  A bit cleaner look and overall a heck of a lot either than the compound miter work I was thinking about.  I should be able to get that going and ready to prime tonight.  Behind on the painting as well, but that's how life goes.  If I prime tonight it won't be that much of a race, but I need to prime the cabinet and route for the T-molding tonight while working on the bezel insert.  The marquee holder is attached so that should be all set.  It's really taking shape.  More tonight.

August 16, 2010

So far, a bit behind, but not bad

Yesterday I:

  • Did the final mount on the control panel box
  • Cut the holes in the box for wires and coin one and two
  • Drilled the holes for all but the trackball in the panel
  • Built and tested the monitor mount
  • Did the layout on the marquee
  • Got the paint
  • Figured out I didn't have a big enough piece of 1/4" plywood to skin the back
  • Struggled with how to mount the bezel for the monitor.  The acer has a 5/8" extension on the bottom.  I guess they thought the monitor needed a chin.

August 15, 2010

Now back to our regularly scheduled program

Lost steam last night, but I have recovered for the morning rally.  Sitting here with my coffee preparing the morning shopping list for Lowes.  Yesterday I glued the control panel box up, figured out it was off, and moved onto control panel layout.

Control panel layout is the biggest pain and most time consuming.  You aren't just building for one game you are building for all games.  Last time the panel was huge so I made it symmetrical.  This time the panel is smaller so I needed to conserve space and comfort so the player 2 control set is actually setup outboard a bit.  I also reduced the space between buttons a bit on the arched 6 button set since it didn't fit my hand quite right.

So last night was spent measuring and aligning.  I like it close enough now so I drilled pilot holes for the spade bit and to ensure that I wouldn't knock the pattern out of alignment.  I set it up on the box to get a good look at it and I like it so onward and upward.  

Underneath side of original panel before removing everything.
Measure, align, ponder, and measure again.
Control panel test fit to see if I like the look.  I do.

Work for the day:
  • Drill holes on the bottom of the control panel box for Coin1, Coin2, and the control toggle (Player1 left group to Player1 center)
  • Rabbet and round-over the control panel box
  • Cut opening for the wires to go from the box to the computer
  • T-molding channel on the side panels
  • Prime everything
  • Prep control panel - holes for sticks and buttons, recess sticks, threaded inserts for sticks and trackball
  • Spend time having fun with the family:)

August 14, 2010

Plan the work, work the ....wait what happened

For those of you building anything make sure that if you draw out plans, make sure that you write everything on the same plan sheet so you can see if something just ain't gonna work.  Built the control panel box this morning and when I set it on the cabinet it was too narrow.  Actually it should work out easier.  Instead of wrapping the box in T-molding I will just use a roundover bit  to ease all the corners and rabbet out the 3/8" on either side.  I said rabbet not dado, so my no more dado pledge remains true....for now.

August 13, 2010

Hi ho, hi ho, it's off to work I go

I love MDF because it cuts like butter and you can shape it with a spoon.  I hate MDF because it dissolves into fine dust of questionable health value the instant anything hits it.  The dust migrates everywhere.  It gives me a new appreciation for sanding drywall which I think is somewhere between the 5th and 6th level of hell.

It was a good thing I quit last night when I did.  I remembered a template from a previous job that I used to help dado the support brackets.  Yes, I know I swore I wouldn’t dado.  I have issues.  I didn’t do that many and I’m done with them.  Everything is narrow crown staples or pocket screws.

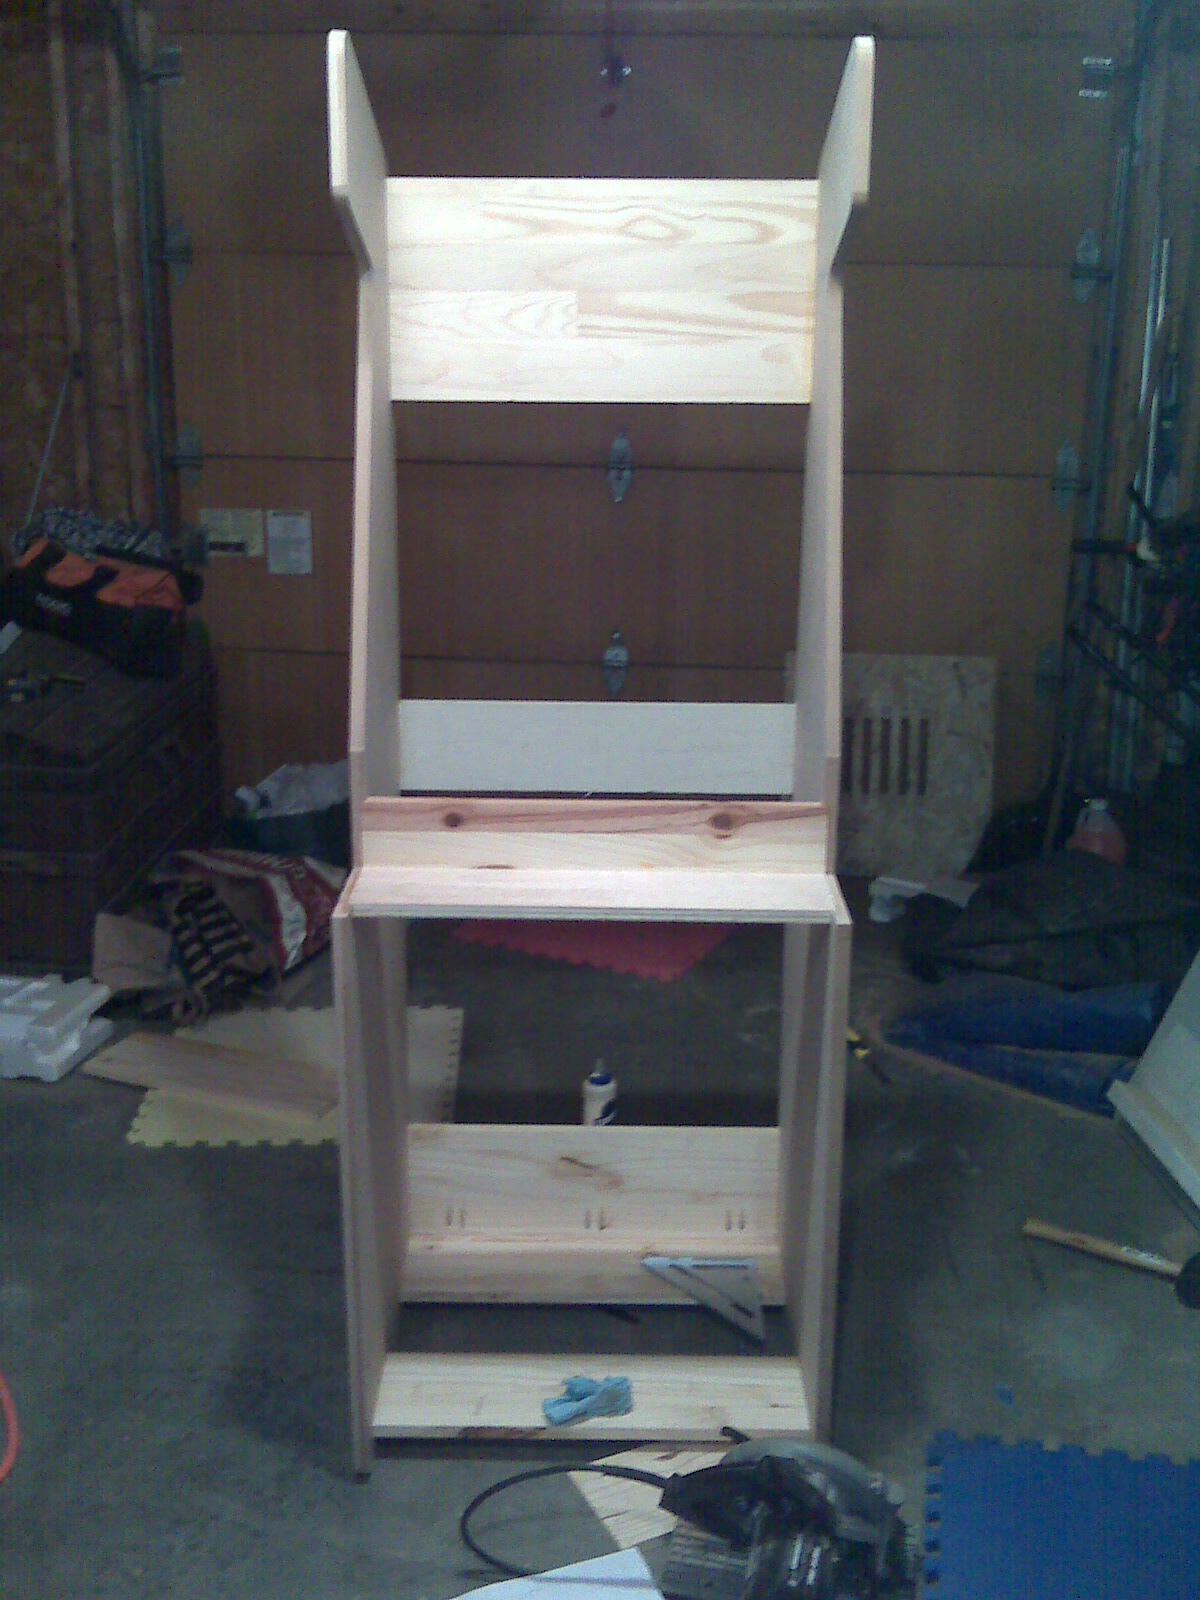
I got the shell glued and nailed together.  I cut the pieces for the control panel box. and then figured out I was going to put a hinge that wouldn’t be able to open so I had to redesign the box.  Now I just have to decide if I’m going to go back out there tonight.  It sure would be nice to get that box on tonight just so I could see more progress.

Here are tonight’s pictures.


I can't believe I made the first try so big.  This one will be so much easier to move.

August 12, 2010

Progress

Didn't get as much done today as I wanted, but both sides are cut and the braces are marked.  Found aggravating news that Lowes and HD don't carry 2x4 sheets of laminate anymore for the control panel top.  I've got two sheets of white, but who want's a white control panel.  I could cover it in plexi like the older ones, but that seems a bit cheesy to me.  Here's where we went today.

All marked up and ready to cut the first one.
Cabinet on a diet
I give up for the night.  Starting to screw up.
Tomorrow the goals are:

  • Get the shell built with major supports in.
  • Measure for the monitor mount
  • Get the control panel blank cut out
  • Build the control panel box
  • Start wiring the panel
  • Test the iPac with the wireless keyboard hooked at the same time.

August 11, 2010

I love it when a plan comes together

Hear's what I building the new one with:
  • P3-1Ghz with 384MB from long ago sitting in the garage for 4+ years
  • Maxtor 120GB drive from closet up stairs
  • ATI Radeon 8500 AGP card begged from Justin
  • IPAC from original attempt
  • 2 – 8 way stick, 1 4-way stick, and enough buttons to choke a horse from try one
  • Acer 233H Monitor picked up with permission from beautiful wife
  • Logitech wireless keyboard showing up tomorrow
  • T-molding and cutter from previous attempt
  • Kensington trackball from Spider used in try one
  • XP Upgrade disked given to me by my Dad 8 years ago, never used
  • Zaxxon marquee

What I’m changing
  • I’m building this thing to fit the house and around the marquee this time.  Last time I built it for the idea of upgrading the display and building it huge to allow for playing room for at least two players.  The house isn’t that big so we lose 4” in width of the body and panel.  Will look better and just as importantly lose about close to 100 pounds off the original both in wood and monitor weight.
  • Screen goes from a 19” Apple CRT from turn of the century won in hardware raffle at former employer to 23” Widescreen LCD.  Would have preferred 21” 4:3 aspect ratio, but you just can’t find anything not widescreen anymore without paying a premium.  The widescreen is actually about half an inch shorter than the 19” CRT in glass space.  I’m going to mount it vertical for the old school games.  Yes I just said old school.
  • No roll out keyboard trays or rolling equipment drawers or IKEA level break down assembly.  This will be a cool looking box with a purpose not an overengineered pain.  If you want to hear about over engineering ask Justin about my drywall lift.
  • Just a swing out door in the front this time instead of the roller tray.
  • Tilt towards you control panel on a piano hinge for easy access to wiring instead of detachable box with unbolting top.  (Thanks Justin for the idea)
  • Probably sticking to glue and screw instead of dadoing everything and it’s brother.  Just cause I can don’t mean I should.  Angle and router setup is a pain on those.
More later.

We have the technology, we can rebuild him.

We now return to regularly scheduled programming after a 3 year hiatus in posting.
The arcade cabinet will live again.  It was the almost great project that just never got finished.  It made it in near finished form to a couple of parties we had, but it just never got finished.  Call it artistic confusion, laziness, or other priorities.  We're having a cookout in 10 days and that gives me a deadline.  I'm off from work for a few days chasing the child around so we'll see if nights and naptimes will let me rebuild the cabinet and make it even better.  This time I know what not to do and I'm better at wiring, carpentry, and about everything than I was back then.  However I older, slower, and have to attempt to keep up with my daughter.